All posts by Kristy Bunton

Wednesday Wisdom

Do you need to set up appointments?

Create an appointment schedule!

On your computer, you can create an appointment schedule in Google Calendar.


Your appointment schedule syncs automatically with Google Calendar.

  • Your appointment schedule and booked appointments automatically appear on your calendar.
  • When you select “Check calendars for availability,” Google Calendar avoids schedule conflicts.

More information here.

Wednesday Wisdom

Do your students know about the Brightspace Mobile App?

The app is called Pulse!

Brightspace Pulse is a mobile app that can help learners stay connected and on track with their courses in Brightspace. It provides one easy view of course calendars, readings, assignments, evaluations, grades, and announcements.

For more information: https://community.d2l.com/brightspace/kb/articles/16502-about-brightspace-pulse

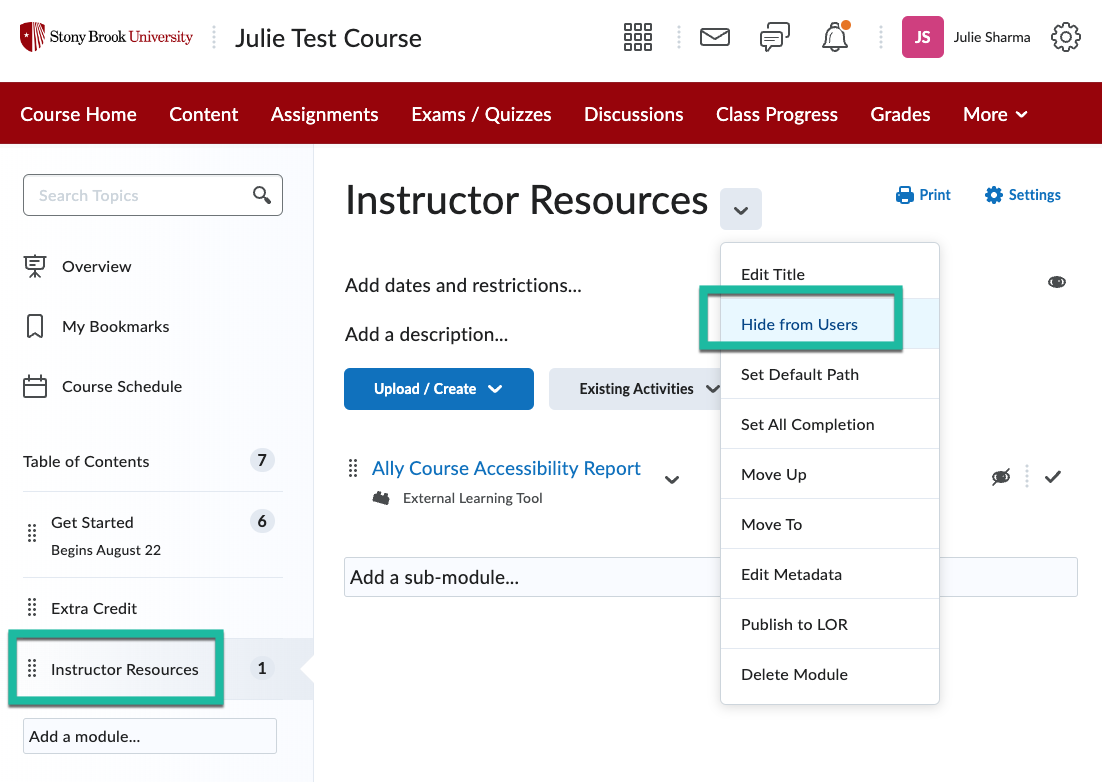
Organize Your Course Using Modules


Students like how course content is organized into modules, making it easier to navigate and understand the progression of the course.

Faculty actively teaching in Brightspace have found that this layout of modules and sub-modules makes it easy for students to navigate the course and find needed materials. (Please note that the Course Overview section cannot be viewed in the Pulse mobile app. It is recommended that if the syllabus is included in the Course Overview area, you also include it in another section.)

EXAMPLE:

COURSE ORIENTATION (module)

  • Syllabus (sub-module)
  • Introductory discussion (sub-module)
  • Links to university resources (sub-module)
  • Required readings (sub-module)

WEEK 1 (module)

  • Week 1 Readings (sub-module)
    • Week 1 Reading 1 (content)
    • Week 1 Reading 2 (content)
    • Week 1 Reading 3 (content)
  • Week 1 Slides (content)
  • Week 1 Assignment

WEEK 2 (module)

  • Week 2 Readings (sub-module)
    • Week 2 Reading 1 (content)
    • Week 2 Reading 2 (content)
    • Week 2 Reading 3 (content)
  • Week 2 Slides (content)
  • Week 2 Quiz

Lets Connect the Dots!

Happy fall semester!

Be sure to connect your assessments to your grades!

One of the first things instructors should do when setting up a course in Brightspace is set up the Grades. This will make the rest of your course setup a breeze!


Create your categories FIRST, then each assessment you add can be designated to a category that you created. Nice and easy!

For more information on how to do so:

https://it.stonybrook.edu/help/kb/setting-up-your-brightspace-grade-book


Releasing Final Grades

In order for student to see their grades in Brightspace, you’ll need to automatically or manually release final grades. (Note, releasing final grades in Brightspace does not send grades to SOLAR; you can either import your final grades Or enter them in SOLAR)

Before releasing final grades to students, you must first check your Grades settings to determine which type of grade will be release and if final grades are set to be released automatically. Alternatively, you can choose to manually release final grades.

For more information: https://it.stonybrook.edu/help/kb/releasing-final-grades-in-brightspace

Wednesday Wisdom

Are you currently using the built-in Brightspace Calendar tool?

If not, you should start today!

Display all upcoming events to learners in one spot. 

Add items such as:

  • Assignments
  • Quizzes/Exams
  • Project due dates
  • Office Hours
  • In-class Events
Students have told us that they are more on track with their assignments and exams/quizzes when their Instructor uses the built-in course calendar!

For more information: https://community.d2l.com/brightspace/kb/articles/18115-calendar

Wednesday Wisdom


Thinking of what you could do this spring break?

How about previewing your grades in Brightspace!

Make sure grades are accurate for your students before they return from break! 


Use the Preview option to see exactly how a student sees his/her grades. 

  1. In Brightspace,click the course selector near the top center and select the course
  2. Once in the course, in the Navbar select Grades
  3. Near the top left, select Enter Grades

Scroll down (or use the View By or search tools) to find the student whose grades you want to preview grades for and select the dropdown next to the student’s name and select Preview