You may have a bunch of files that you want to share with your class. Are they a bit on the larger side? Perhaps it will make some servers happier if you store them in Google Drive rather than directly into your Blackboard course site. (Think a semester’s worth of videos.)
So, then – how do you share them with your students in such a way that they can’t be downloaded? (I’m not saying that allowing students to download the videos is a bad thing. Downloading can make it easier for offline consumption of the material – like while on an airplane or other low access areas like southern Maryland.)
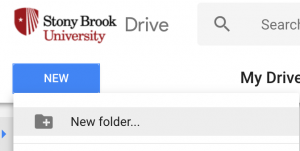
The first part of this process makes perfect sense. We want to be organized, so we create a folder for the content. You created the folder and that makes you the owner.
Next, you share the folder. If you double click on the folder, it will open, leaving you with a screen that shows it’s path at the top.

Clicking on the name of the folder (you did name it, right?) Will reveal a drop down menu:

Select “Share…”

See that tiny font in the lower right corner… it says “Advanced” — click that.
Then there are owner settings at the bottom. Please check off “Prevent editors from changing access and adding new people.” This will help prevent some headaches later if you give someone access higher than what you really wanted.


Now – add your students. I’ll show you want I do, but you might have a easier way. Feel free to comment below.
Go to your Blackboard course site, and go to “Users and Groups”

Open Users.
Show All in the lower right, and sort by columns by “Row” (this will lump the Instructors, Teaching Assistants and SLN Help Desk people at the top and bottom of a list of all your students.


Drag your cursor to highlight all of the student emails on the page and copy them to your clipboard (command C). This unfortunately grabs other columns as well that include usernames and other information that we don’t need, but that isn’t so bad.
Next, paste this into an empty spreadsheet. I use Numbers. Make sure all the emails are in the same column, my very first row usually has the email in the wrong column, so I paste it into the right one. Then I delete all the non email columns, select all and copy the one column that is left that has the emails. (Yes you can probably select all of that one column without deleting the others… but like I said, this is just what I do.)
Now with the emails on your clipboard go back to your Sharing Settings of the folder, and paste them into the “Invite people:” text box.

Even if there are hundreds of addresses, this should be fine, though you may need to let google think on it for a bit.
Make sure you aren’t giving them the keys to the kingdom… and select “Can view only”

Next, add the files.
You may think you are done. After all, you said they can “view only.” Viewing is viewing and downloading is something else right, so it shouldn’t be able to be done if you can only view. Not true in Google Drive.
For each file that you have loaded into the folder, we need to back into that sharing settings. We get to it in a slightly different way. Highlight the file by clicking it once. After it is highlighted, some more tool icons show up in the upper right. Pick the one that looks like a person with a plus sign.

Click Advanced again.
There is a new option! Make sure “Disable options to download, print, and copy for commenters and viewers” is checked.

Now, do that for every file in your folder. You are done!
** (Note that your students can still screen capture your videos and share them with whomever they want if they are really determined. That is just what people do. If you lock a door, it just makes people more determined to get inside.)
Like this:
Like Loading...