Category Archives: Keep Teaching

Providing a Google Web Conferencing Solution that Includes Phone Support [cross post from the Academic Technology Services blog]

The web conferencing solution given here will work from the Google Apps that you are already familiar with.  We will start in the Calendar App.

Create a new Event.

Give it a name.

click on Add rooms, Location or conferencing

Then click on “Add conferencing”

This will immediately give you a Join Hangouts Meet link and the URL is seen below that link.

Use the chevron to it’s left to see more information

Now… you can see a phone number and meeting room PIN that you can also provide to your class. (Do not use the number or URL shown above. Use your own.)

Rather than try to invite your whole class under Add Guests… take this information and get it to your student via Blackboard or email. Just provide them with the URL, phone number, date and time.

Google Hangouts Meet will handle up to 250 participants in a single room.

You can record too as of 3/10/20.  

that is found under the …  in the lower right part of the screen.


Creating new sections in Echo360

You may want to need to create a new section in Echo360 if you have need to store videos and/or power points for a course, but have not used Echo360 so far this semester.


To create a new section in Echo360, we will want to login to Blackboard, go to the course area that you want your link with Echo360 to appear (typically some content folder) and “Build Content” -> “Echo Cloud”.

Now give the link a name. This may be something like “Course Videos”, “Video Lectures”, etc.

Click “Submit”.

You now click on that link you just made.

Connect your Echo360 Content

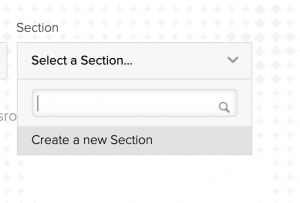
Select the Term, Select your Course, and then select “Create a New Section”.

Enter the Section Number in the form 01, 02 etc.

Description is optional

Click Save

Now Click the lighter blue button that says “Link Content”

You can now begin to upload content to your course for this section by clicking New Class.  A Class is going to be the day that you want the students to view the content. You select the date first and then after that Class is created you can upload associated content by click on the plus sign in that row. Content can be videos, or powerpoint type presentations.