SUNY CPD’s Brightspace Training Options
As the Fall 2022 semester approaches many SUNY faculty and staff are preparing to design and/or deliver their digital course materials in the new SUNY Brightspace Digital Learning Environment (DLE). The SUNY Center for Professional Development (CPD) is pleased to support SUNY faculty and staff by providing a variety of Brightspace training opportunities and asynchronous resources. These training workshops and resources are available for free to all SUNY campuses and are detailed below.
Training Options:
The CPD offers a variety of training opportunities to provide as much flexibility and choice to our SUNY faculty and staff. Registration for August sessions is open and new sessions are released based upon registration demand. If you don’t see the workshop you want at the time you need, please continue to check back, the registration site is updated regularly.
Asynchronous Online Modules
• SUNY DLE’s Asynchronous Brightspace modules are a convenient way to progress through the Brightspace training at your own pace. Progress in the recommended order, or pick and choose which topic(s) are most relevant to your purposes.
• There are optional knowledge checks at the end of each topic sections. Participants who successfully complete all assessments will earn a Brightspace Fundamentals Certificate and Badge from the SUNY CPD.
• Access to asynchronous modules will be staggered to accommodate the priority needs of Cohorts 1 and 2, as well as the availability of faculty accounts in the new Brightspace environment. When your campus Brightspace account has been created, your campus will provide your login instructions.
Scaled Webinars
• Targeted for larger audiences, these scaled Zoom webinars offer live demonstrations of the Brightspace learning environment and other training topics. There are opportunities to ask questions of Brightspace experts at each webinar.
• These webinars are open to all SUNY faculty and staff, regardless of cohort.
Remote Synchronous Workshops
• These live “point & click” workshops are offered via Zoom and will cover the Brightspace Fundamentals training materials. Select a training session based upon your preferred training pace (see Training Levels, below).
• These sessions are limited to 10-15 participants per session.
• Currently, Remote Synchronous Workshops are available to Cohorts 1 and 2.
Illuminations
• These advanced Brightspace workshops are offered in the scaled webinar format and feature Brightspace tools and topics not covered in the Brightspace Fundamentals training.
• These workshops will commence September 2022.
Training Levels
We offer multiple training levels to help ensure that faculty and staff receive the style and pace of training that works best for them. Registrants are encouraged to take a brief self-assessment to help identify their training preferences. Upon completion of the self-assessment faculty and staff will be provided a recommended training path. All training opportunities are available, however, regardless of the recommendation.
Recommended paths:
• Spark – Synchronous remote workshops at the “Spark” pace, with supplemental Scaled Webinars and Asynchronous Modules, as desired.
• Ignite – Synchronous remote workshops at the “Ignite” pace, with supplemental Scaled Webinars and Asynchronous Modules, as desired.
• Blaze – Scaled Webinars, supplemented with Asynchronous Modules, as desired.
• Bonfire – Asynchronous Modules, supplement with Scaled Webinars, as desired.
Recordings
• Recordings of all training options are available to SUNY faculty and staff on the SUNY DLE website behind authentication. Log in using your SUNY Federated ID (your campus username and password through single sign on) and you will be granted access to the recordings.
• As new workshop topics are introduced, new videos will be released.
Resource Guides
• Faculty resource guides will be available by August 4, 2022 on the
DLE website.
• These guides will provide written instructions for all topics covered in the Brightspace Fundamentals workshops.
• In addition to written instructions, the resource guide page contain links to videos that demonstrate specific tools and actions within the Brightspace environment.
Registration
We look forward to seeing our SUNY faculty and staff in our upcoming SUNY DLE Brightspace programming. For questions regarding programming, please reach out to Jamie Heron, SUNY Online Program Manager, SUNY CPD (jamie.heron@suny.edu). For technical questions regarding the registration process, please reach out to Viktorya Mirzoyan, Program Coordinator, SUNY CPD (viktorya.mirzoyan@suny.edu).
Jamie Heron
SUNY Online Program Manager
SUNY Center for Professional Development
Like this:
Like Loading...





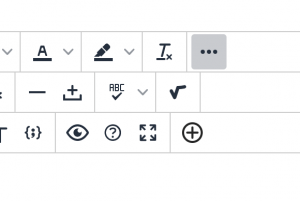
 The second way and previously feature sparse method (but this has been rapidly changing!), is to embed the echo360 content into any area of your site that gives you the ability to use the Bb text editor. You can embed content using the wysiwyg editor using the button : “Add Content -> Echo360 Video Library”. It looks like a plus sign in a circle and is the last button on the bottom right.
