Setting up an organized gradebook isn’t the same as in Blackboard. If you are used to Bb, there are going to be some headaches and confusion.
Some things are organizationally nice. For example, you can assign items to belong to grading categories, and they stay grouped that way in the grading spreadsheet. Not only that, but items in a grading category will get a subtotal column auto created for you, which I think can be particularly helpful if you are keeping track of attendance in your gradebook. (Note: the attendance tool in Brightspace does not report into the grade book. This is something I manually setup.)

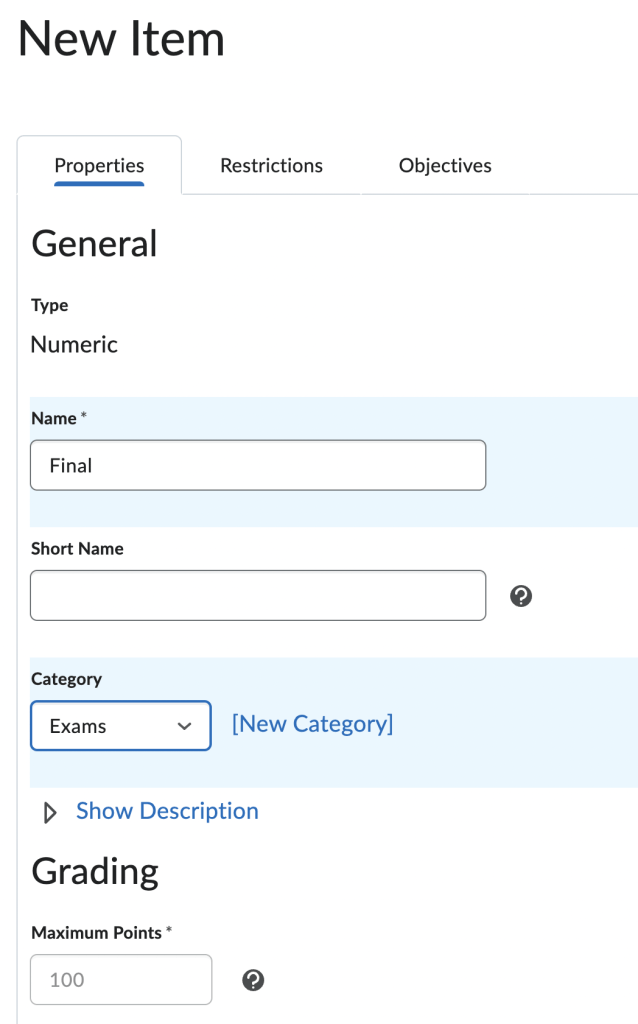
To create new categories or items (columns), you will want to go to “Grades” -> “Manage Grades” and then “New”.
To decide on your categories, you should refer to your course syllabus. You should have something like:
Class Participation/Attendance – 15%
Quizzes – 20%
Midterm – 20%
Project(s) – 25%
Final – 20%
You can see that every item listed that has multiple items nested (Class Participation/Attendance, Quizzes and possibly Project(s)) will be your categories. Since there will only be one midterm and one exam, you cou hold them as just singleton items that are not in a category, OR you could make a category called exams and add them both to that.

First make the Categories, then the Items inside the categories.


Since you indicated in the Category that all items would have a total value of 100, the maximum points fills in automatically for all associated items and is a graded out field.

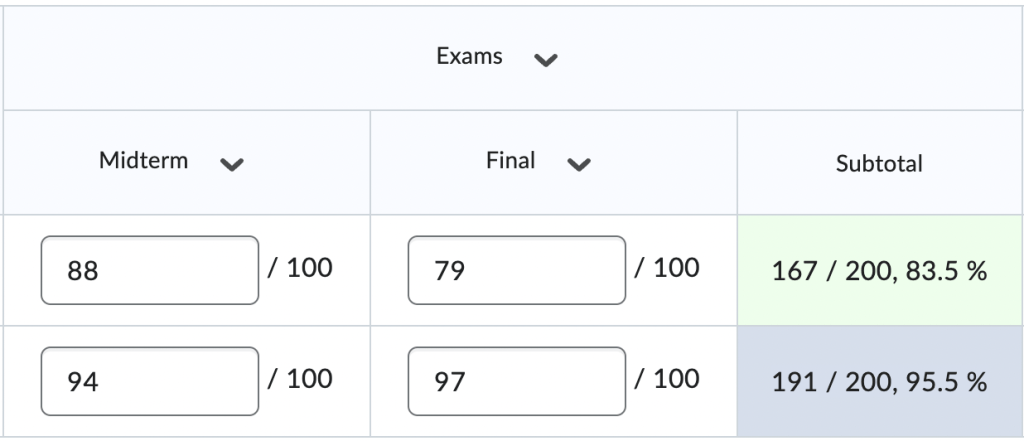
Resulting spreadsheet with grades filled in:

Note: I manually filled in these grades and you are able to do that. If you want these grades to auto populate from an actual brightspace exam, you will want to go to your Exams/Quizzes area from the NavBar and create or find the exam you want to use, and associate it with the right Grade Item.
Warning: This is one of the places where Brightspace can be … shall be say, confusing? When you go to edit your exam/quiz, you will see this:

That Category pull down… even though. yes, we were just calling things items and categories in the Manage Grades area, has NOTHING to do with categories in Grades.
Instead, you will want to switch to the Assessment tab and find the pull down for Grade Item.

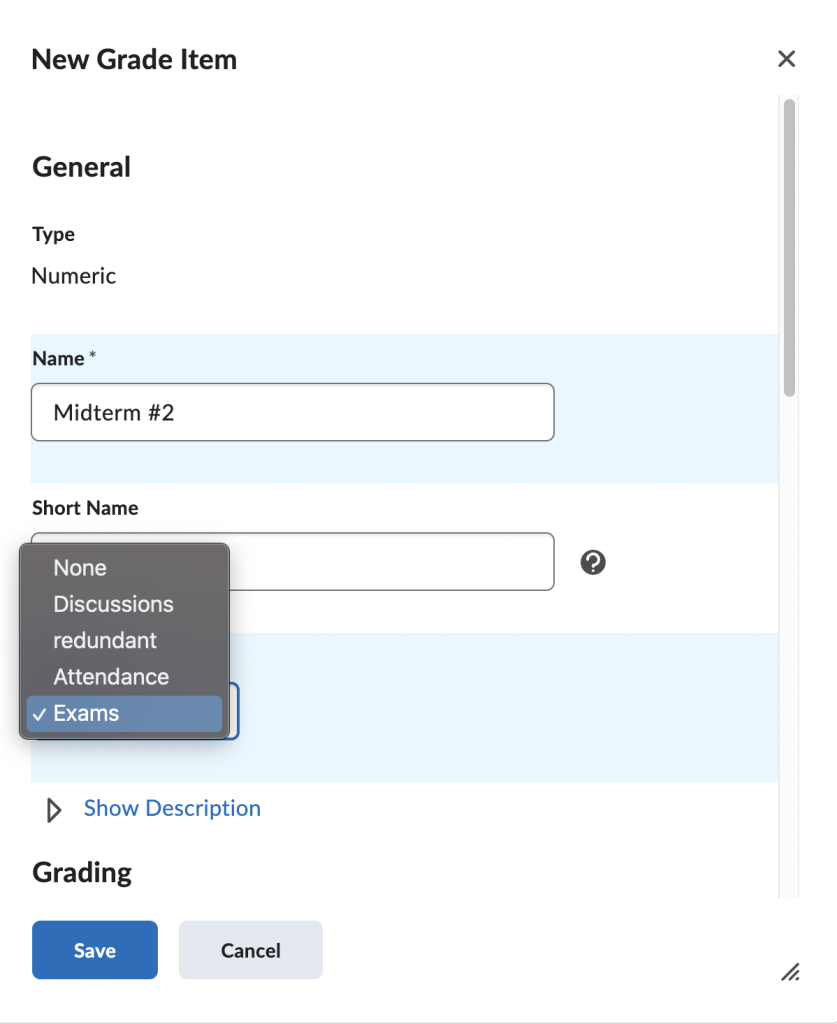
If you haven’t already setup the Items in your grade book, you do have an opportunity to select [add grade item] and throw in the item into an existing category.

Now it knows that this Quiz is from the Category “Exams” and will grade it and submit it into the grade spreadsheet appropriately. It also knows that it will be worth up to 100 points and will be equally weighted with the other exams to the 20% total value of the final grade, because that is how the category Exams is setup.
End of Part 1
Like this:
Like Loading...


