Category Archives: assessment

Brightspace: Advanced Assessments

Previously Titled: New Feature in Brightspace: Graders and Grade Release Permissions


Step by Step Advance Assessments

Create an assignment in Brightspace

Go to the Evaluations & Feedback side panel and expand it to see the options.

visual of side panels associated with assignements

expanded evaluation & feedback vidual

These options, depending on what you pick, reveal additional options.

Click on Select Evaluators (you can choose from the people enrolled in your course with a grading permissions role.)

picture of the select evaluators area of brightspace

Choose how evaluations will process with multiple evaluators.  You can choose between:

  • All evaluators work on the same evaluation together. Publishers release this evaluation to learners.
  • Evaluators work on their own evaluations separately. Publishers aggregate results into one final evaluation and release it to learners.

screenshot of the stated evaluation options

IF you have multiple evaluators: Allocate Evaluators to Learners (select which graders will grade which students)


the pull down menu lets you choose from

  • Allocate all evaluators to every learner
  • Randomly allocate 1 evaluator to every learner evenly

screenshot of the allocation methods

You can manually finese these generic selections by using the Evaluator Allocations options area and checking or unchecking students for a given evaluator.

If you have new students come in to the course, Brightspace will follow the automatic allocation method you picked for the new learner enrollments.

Choose publishers:

screenshot of the select publishers area


Important: It’s best to configure these settings when creating your assignment. If that’s not possible, make any necessary adjustments before receiving submissions. Once a student has been graded, these settings become locked and cannot be changed. Additionally, if submissions exist but no students have been graded, removing all evaluators will permanently disable advanced assessment features. This means grading will revert to the standard assignment process as it existed before these features were introduced to Brightspace.


notebooklm icon to indicate chat featureChat with my Advanced Assessments NotebookLM about this subject if you have any questions. You must use your SBU gmail to use this feature. (I am learning how to do this and may need to add each person who wants to use this chat. Feel free to reach out with a request if that turns out to be the case.)


Deep Dive by NotebookLM: Listen to the Audio here.


Gradebook Quicktip

If you are looking to work on your grades offline in excel, and you know you will want to create new columns that you want your students to see, create the columns first in Brightspace, and then export the file as a CSV.  Even though there is language in the process that suggests you can create columns offline, I do not suggest trying to do this.

To create a new column, go to Manage Grades -> New -Item.

Shows the dropdown menu to choose "Item"

If this column only needs to be seen by students, and will not interact with anything else in brightspace, I suggest choosing the Text option for the item type.

shows the list of item types with Text circled.

Text columns are only visible  to students if you have the setting “grade scheme symbol” checked in Grades -> Settings -> Org Unit Display Options -> Student View Display Options.

screen shot of Org Unit Display Options and the Grade scheme symbol

Conversely, if you don’t have this box checked, I guess you can use this column type to make notes about each student that you don’t want them to see? Like name pronunciations or pronoun notes.


Teaching and Learning with AI Conference: My Poster Presentation

It isn’t really a poster presentation – click for the full slide deck

click here for presentation.

click here for presentation.

The general concept of this presentation is to remind instructors that by creating a solid syllabus, they have already done most of the work that will allow a generative AI tool to be extremely helpful to both the students and to themselves.

Brightspace had a conference: Fusion Highlights and Followup

Highlights:

  • Achievement Plus Product Tour, September 10, 3-3:45pm EST (register here)

Open Workshops for polling/clickers today

Echo360 (which bought Turning Technologies) will be on campus today (9/12/23) to run two workshops and to assist walkup students with their clickers/mobile licenses.  Workshops are in the Faculty Center in the Melville Library 10-11 and 3-4 (beginner and advanced).  Students should go  to the SINC site for the walk up assistance.


Roadmap for Voicethread. Some nice new features on the horizon:

Image of a folded map with a VT logo superimposed

The arc of change in the teaching and learning universe may be long, but it bends towards a more accessible, equitable, inclusive, and human-centric world. We plan on shortening that arc just a little bit in the coming year by introducing the biggest updates to VoiceThread in more than a decade.

A “New VoiceThread” will be available in the coming months, and we’ll have lots of details to share, but what we really want to share now is our redesign philosophy:

  • Significantly more accessible

  • Add a number of pro features, but be simpler to use

  • Designed based on research and user feedback

  • Make it easier for people to have authentic, high-quality, human to human interaction

  • Give everyone time to try it out before fully transitioning to the new version

In addition to the new VoiceThread, we have lots of new goodies on the way:

  • New integrations for Zoom, Google, and Microsoft

  • New assignment type allowing students to comment on classmates’ submissions for a formal grade

  • More powerful closed caption preferences

  • Lots of new mobile updates

Thank you for all your feedback, collaboration, and enthusiasm throughout 2022. None of this work could be possible without you.

– The VoiceThread Team

CHAT GPT

I’ve been using this tool since it became publically available to mess around with, and boy oh boy is it a game changer.  For me, I am trying to wrap my head around how this forms the future of education.  I’m not as concerned about how we will stop cheating – but of course that is the immediate question that many of you will have.  Rather than paraphrase what is already out there; I’m going to share with you a recent response that I think sums it up nicely from the EDUCAUSE Connect listserv:

“There are a few responses to ChatGPT (besides panic) that I’ve seen and walked folks through, and it kind of goes by what level of intervention you want to work with.

By tool:

  • Huggingface.co’s output detector: https://huggingface.co/openai-detector
    Also developed by OpenAI, and it’s not 100% effective, but will at least be a somewhat efficient method if there’s something suspicious


By question:

  • Ask questions that are very, very specific or require application of a concept to a unique problem or phenomena. The more specific, and more recent, you can be the better. ChatGPT’s data is about a year old, so asking about something more recent means it won’t have good information about it. In addition, asking for specific information from a tool meant to give general information increases the likelihood of misapplication (which would be easy for an instructor to notice).
  • Ask questions ChatGPT can’t discuss. It’s programmed to be limited (for now at least) to avoid controversial topics like the current war in Ukraine. If the course material allows for and it’s appropriate, adding in questions that the bot can’t respond to will mitigate its use.
  • Focusing on process questions rather than informational ones. “Which applies better and why”, “explain a statement and why you think it means that”, “which solution to a problem is more appropriate and why”. The chatbot can’t coherently explain its rationale to specific problems the way a human can.


By activity:

  • Authentic assessment can get over some of this by engaging students in activities that the bots can’t experience and draft a response. And there would be (typically) multiple components as part of the demonstration of mastery. This can be accompanied by application essays, “What I learned doing X”.
  • Scaffold work so that written papers are only a component of the final assessment. Even if its including initial and final drafts of work so a paper can’t be generated quickly.
  • Involve ChatGPT. Ask students to generate a paper from prompts about a topic and use their knowledge about the topic to correct it. This could include identifying and correcting misinformation, including citations, etc… Hopefully this would also discourage their use of the tool for academic cheating as they see how easy it is to find problems.

Long term, I think it’s going to take a lot of thinking about what it means to study and assess learning in the age of the chatbots.

As a fun test, I also gave the prompt “What should instructors do to prevent cheating using ChatGPT?” to ChatGPT, and this is the response it gave:

ChatGPT is a chatbot that uses natural language processing (NLP) to generate responses based on a given prompt. It could potentially be used to cheat on exams or assignments by generating answers to questions. Here are some strategies that instructors can use to prevent cheating using ChatGPT or other similar tools:

  1. Make it clear that cheating, including the use of chatbots or other AI tools, is not acceptable and will result in consequences.
  2. Use a variety of assessments, such as open-book exams, take-home exams, or oral exams, to make it more difficult for students to cheat.
  3. Use plagiarism detection software, such as Turnitin, to detect copied work and ensure that students are submitting their own original work.
  4. Monitor students closely during exams to ensure that they are not using ChatGPT or other technologies to cheat.
  5. Consider using proctored exams, in which a proctor monitors students during the exam to prevent cheating.
  6. Educate students about the consequences of cheating and the importance of academic integrity.

Overall, it is important for instructors to be proactive in preventing cheating, including the use of chatbots or other AI tools, and to take appropriate action if they suspect that a student has cheated.

Best,
Dan


Daniel Cannity (he/him)
Team Lead, Instructional Design, Engagement, and Support (IDEAS)
University of Massachusetts Amherst
e: dcannity@umass.edu”

I too actually asked the ChatAI about running submissions through plagiarism checkers and got some interesting answers as well.  Also, I love an AI that has been designed to detect whether a writing was written by another AI.  It is all very interesting.  Hold on to your seats and enjoy this rapidly changing world!


All Those Test Options in Blackboard & How to Give a Synchronous Test*

This blog entry is going to focus on the options in Blackboard that have to do with the timing of an test.

When you are first creating the Test.. these options are found under the Test Information area and span a few sections.  If you have already made the test you can find these options by clicking the chevron next to the test name and clicking “Edit the Test Options”.

Force Completion


When you set this option, if the student looses the connection or accidentally closes the browser, they will be unable to go back and finish the test. (Without you having to intervene anyway.)  We don’t recommend enabling this setting.

Set Timer

This option gives the student a visible countdown timer during the test. It begins after the test description and instructions have been displayed. If Auto-Submit  is selected, at the end of the count down, it ends the test, no matter where they were.  If Auto-Submit is not checked, you will see an exclamation point in the grade center and have the option to adjust the grade, if they went long.

If the Force Completion is not set, and a student looses their connection or accidentally closes the browser, they will be able to continue taking the test, and the timer will continue from when it initially started. (eg., If they loose the connection for 10 minutes, they loose that 10 minutes.)

Display After and Until

A better way of handling whether students can see the test, rather than the “Make the Link Available” option.  Also consider, they can’t start what they cannot see.  *So if you want everyone to be done by 1pm and you have a 30 minute timer with auto-submit enabled, consider Display Until to end around 12:30. 

Due Date

Due dates (and times) do not affect the test availability (unless you choose the Do not allow students to start the Test if the due date has passed option), but rather provide a flag on the test if it was started or ended after the due date/time.

Test Availability Exceptions

This section allows you to make test rule exceptions for people that need accommodations, or have other needs depending on language or technology situations.

If these settings exist for a test or survey, you can create these exceptions:

  • Number of attempts
  • Timer
  • Availability: Date and time the test is available to the student or group
  • Force completion
  • Restrict location


Have any interesting testing stories to tell?  What other testing options do you have questions about?  Please comment below!

This blog is a cross post from https://you.stonybrook.edu/academictechnologyservices

Accepting Videos as an Alternative form of Course Assessment

This is about using a echo360 mashup tool to accept video submissions inside of Blackboard and which instructor will be able to grade under Needs Grading in the Grade Center.  This is an excellent alternative to high stakes grading via traditional exams.

First you will want to create an assignment. You will go to your Assignments area and go to Assessments -> Assignment.

Give it a name and add instructions for the students to follow.

Create a due date and points possible for the presentation.

Make the assignment available to the students.

Submit.


What the students see:  (You can also see this yourself using the student preview mode, entered by clicking on this icon in the upper right part of the screen in blackboard:

Under assignments, they locate your assignment and click in it’s name.

They see the points possible and the instructions that you wrote previously.

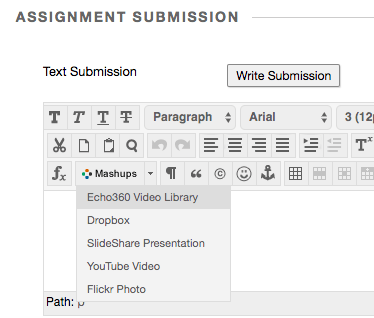
They need to click on Write Submission to get to the Blackboard WYSIWYG editor. They should type the name of their assignment into this text box and then select the Mashups button.

Then they click on Mashups -> Echo360 Video Library

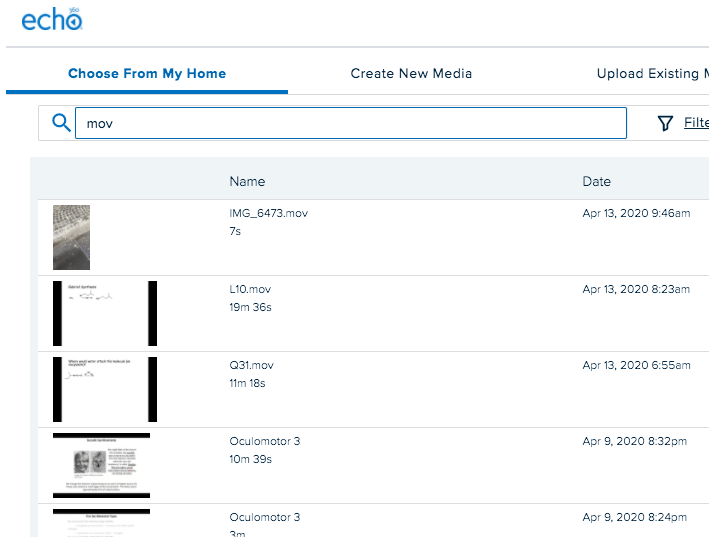
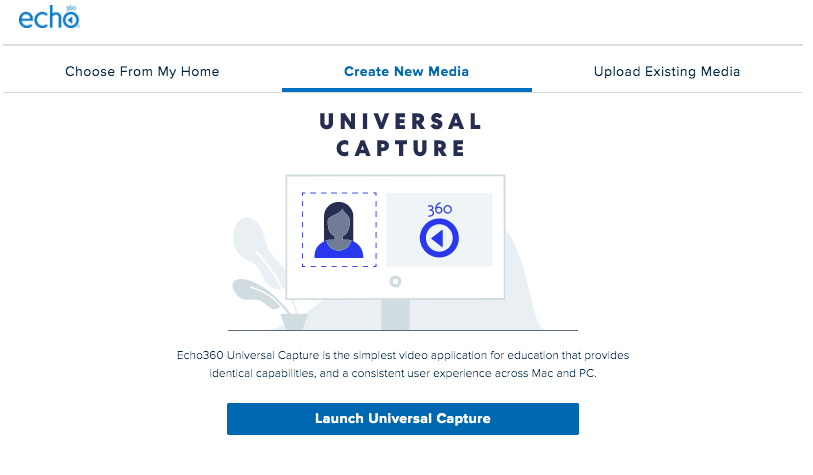
This opens a new window for them where they have three choices.    They can choose any video already in their echo360 video library. (That is Choose From My Home), they can create something new (Create New Media) or Upload a video they have on their computer. This is what the different options look like:

Choose from home allows the student to either browse or search for files in their echo360 library.

Create New Media will give them the option to Launch Universal Capture from their computer.

Where they can name the video and start recording from their webcam, desktop and audio.

and finally Upload Existing:

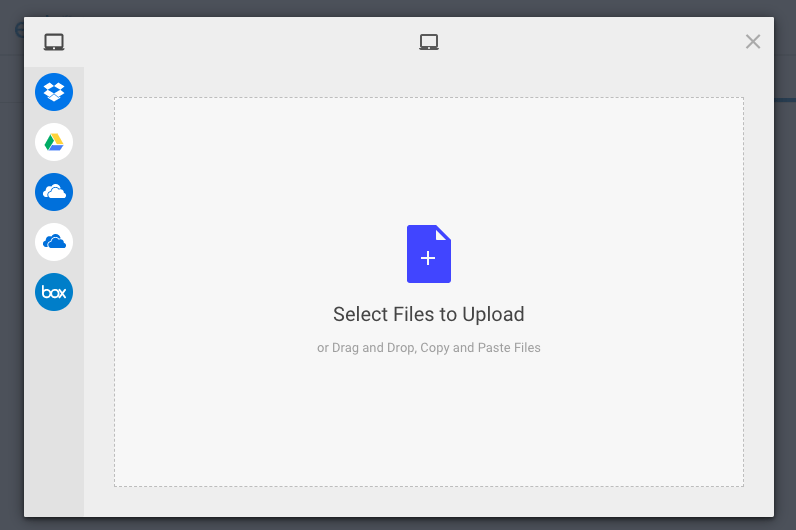
Here they can grab videos from their cloud storage locations or browse from their computer.

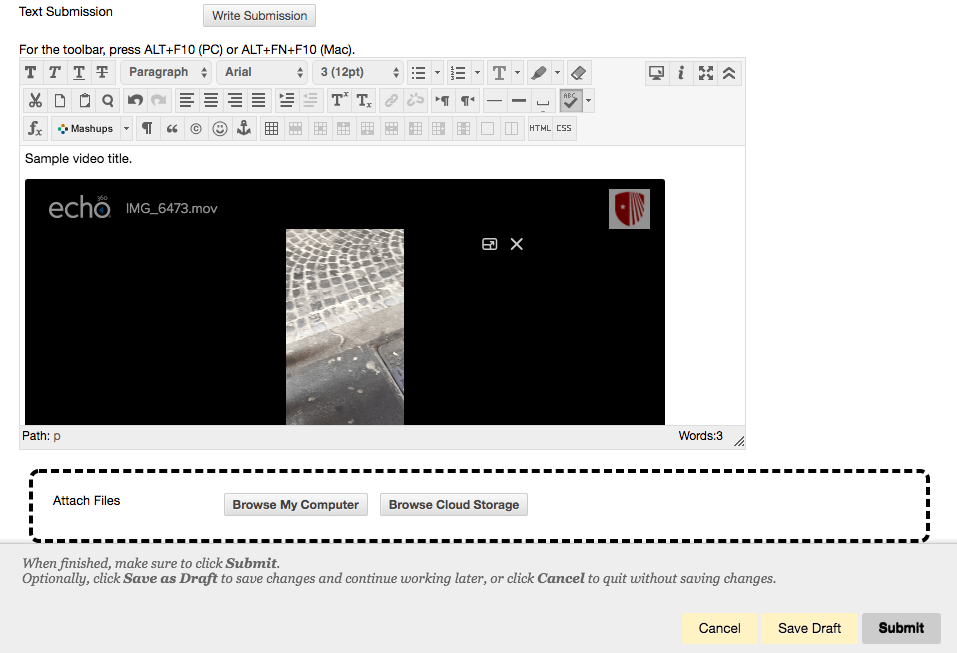
After they have typed the name of their presentation and selected the video, they will click submit.

After submitting they will get a submission confirmation:

As the instructor, you can find the student submission under Needs Grading in the Grade Center:

…where I will see the list of submitted assignments and I can either chose Grade All or go through them one by one.  Here is the assignment I submitted and you can view the presentation, grade it and leave feedback for the learner right here.

Have a used clicker?

Some used clickers are coming from classroom kits where, because they are used differently than we do here at SBU, have had their clicker IDs changed and they no longer match the ID printed on the back on the device.  This will result in your course results not processing correctly.

To check to see if you device ID is set correctly…


press the wrench button
then the go right button twice
press the button under where it says OK
press under OK one more time
You should see Device ID: and whatever the device is set to will show here.
see if that matches what is on the back, printed on the clicker.

IF IT DOES NOT MATCH;  please email sliebschner@turningtechnologies.com   

After contacting Susan, follow her instructions to have this resolved.