Category Archives: Teaching

Reusing Echo360 content

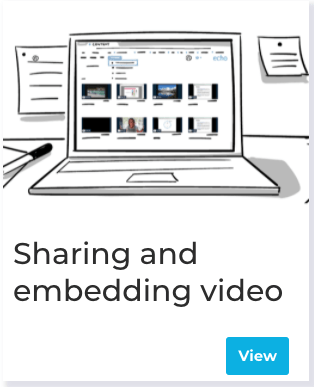
There are two different ways of sharing echo360 content in Blackboard, and therefore two different ways to reuse the content as well.

Most instructors at SBU currently link to their echo360 videos via LTI links.  This has been the only way in the past to get the analytics that you needed, give the students the active learning tools and also automatically post new scheduled recordings as they happen throughout the semester.  Using the LTI link is the process where you are going to a content area where you want the videos to be placed, selecting “Build Content -> Echo Cloud”.

When reusing the LTI link in a course you have copied from a previous semester, you will want to go to where the link was made (it will still be there), click on that link and reconnect it.


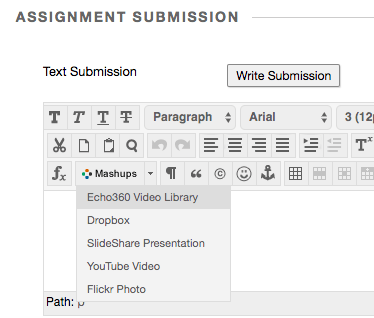
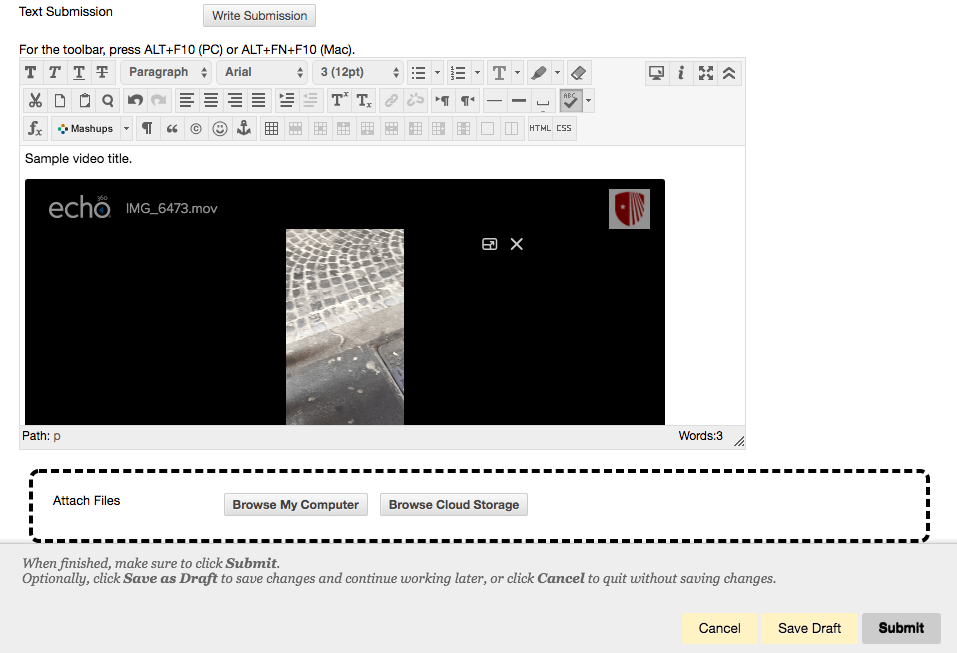
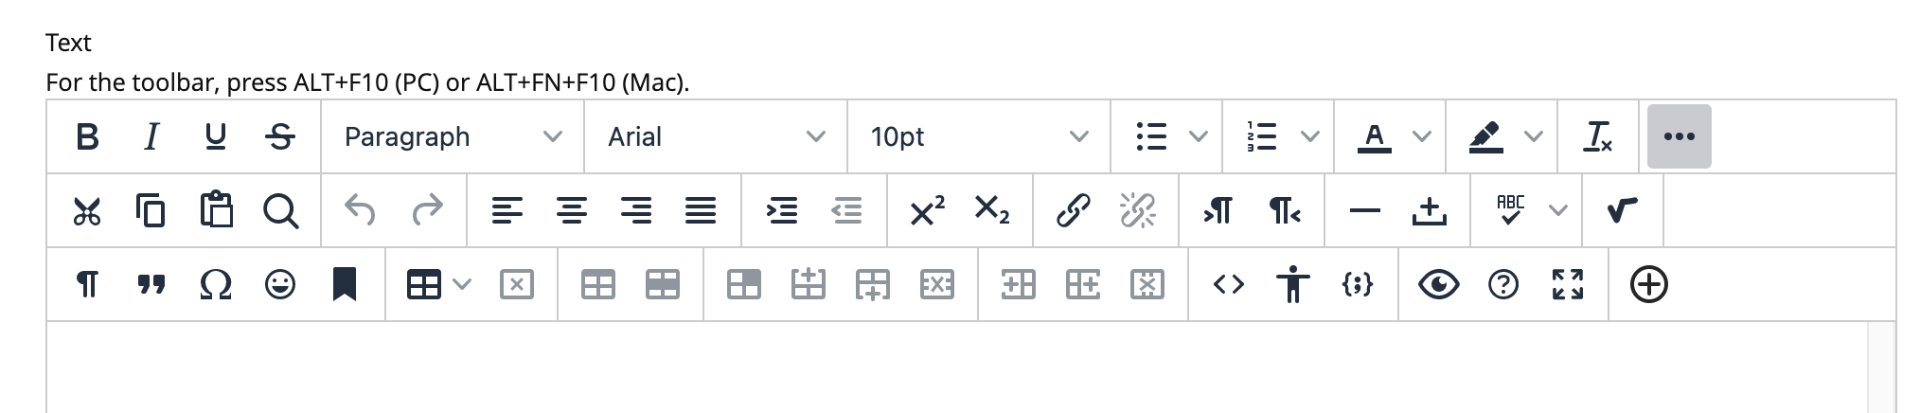
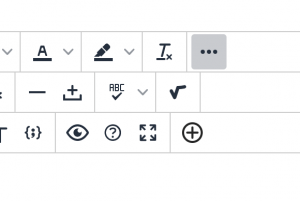
The second way and previously feature sparse method (but this has been rapidly changing!), is to embed the echo360 content into any area of your site that gives you the ability to use the Bb text editor.  You can embed content using the wysiwyg editor using the button : “Add Content -> Echo360 Video Library”. It looks like a plus sign in a circle and is the last button on the bottom right.

When you have embedded content and you run a course copy, the video will still work without further tweaking.  It is for this reason, and because echo360 has been working hard to bring all the features to the embed model that already exist in the LTI links, that we will be suggesting using embed going forward (at least, as soon as playlists are up and running and that could even happen this week).


Getting Started with Echo360


These pages are here to provide Instructors a walk-through of the more commonly used features of Echo360. The pages contain click-through infographics, videos, links to our online documentation, and Quick Reference Card links, available for viewing and download as PDFs.

Start with the Overview. Learn about the typical uses of the platform, navigation in and around Echo360, and get insight from other instructors on creating media and engaging students.


Overview of echo360Creating and uploading mediaSharing and embedding video Overview of Echo360 analyticsEditing MediaIntegration with MS Teams and Zoom


 The menu image in the top-left corner of every page opens a Table of Contents for everything here. Easily browse for the pages you want to view or re-visit. Hover over each item in the list to see the full title of the page. Go ahead, click it now! The Search functionality is on the top-right corner of every page. The Main menu icon is in the footer of every page.

New VoiceThread Assignment types

Voicethread.com
A video about the new VoiceThread Asssignment tool
A video about the new VoiceThread Assignment tool

Get ready for new VoiceThread assignments! A number of courses and institutions have adopted already, and we’re looking forward to having everyone else upgrade by June. If you haven’t gotten started with the new features yet, please check out the resources here.

What’s new?
Too much to list here! Some highlights are:

  • A streamlined interface
  • More control for instructors
  • Editable assignments
  • A “student gallery” so students can easily see classmates’ VoiceThreads
  • Better feedback for students

Getting Started

If you are using VoiceThread in your Learning Management System, you can start using new assignments in your courses right away. Turn it on for some courses and leave it off for others until you feel comfortable.

If you are a VT administrator, you can require all courses to remain on the old version of assignments or move everyone to the new version immediately instead. You have full control over when and how your institution updates.

Is there any interruption?
Absolutely not! All of your older assignments will continue to work seamlessly, so you don’t need to rebuild anything or warn your students about an interruption. There is no down time as you transition, and no back-end technical work is required.

Do I have to use new assignments?
Not yet. You can start exploring and using new assignments today, but it is optional for now. You have until June 30, 2021 to migrate at your own speed, and then all remaining courses will be updated automatically.

Where can I get more training?
Join us for one of our live walkthroughs! Workshops are open to everyone, and each one will be recorded so you can watch it on demand later.

February 16 at 1:00pm ET
March 9 at 1:00pm ET

You can also watch the recording of the previous workshop we offered on this topic.

Thank you for your partnership while we worked on this major update! We can’t wait for you to see what we’ve been doing.

The VoiceThread Team

Where Can an Instructor Turn ASR On and Off in Echo360?

SBU will be setting Echo360 to automatically produce Automatic Speech Recognition after a recording is finished.  This will bring it into line with Zoom and VoiceThread which already do this.

If the instructor would like to turn this back off, they can follow this link:

Enable or Disable Automatic Transcriptioning for a Section (ASR)

image of setting panel in echo360

Creating a VoiceThread Assignment that is tied to the Blackboard Grade Center

To create a VoiceThread Assignment, you will go to Build Content -> Mashups -> VoiceThread.
Make sure to enable Grading.
Screen Shot 2020-04-30 at 9.05.25 AM.png
If you forgot to do this part, you will not see the Assignment Builder option in the next step.  You can go back and enable grading if you need to:
1. Edit the VoiceThread link that you’ve already built in Blackboard.
2. Scroll to the grading section and make sure that “Enable Evaluation” is set
to “Yes.”
3. Set the number of points your assignment is worth.
4. Save.Now Click Assignment Builder.

Screen Shot 2020-04-30 at 9.06.56 AM.png
.

After you click on Assignment Builder you will have options of VT assignment types:

This is the Create a VT option:
Notice the option to allow resubmitted assignments
This is the Submit a Comment VT assignment option:
Note the name of my assignment is VT test.
The watch a VT assignment looks much the same where you have to select the already built VT (or create a new VT that you want them to watch).
The Grade Center won’t show that something has been submitted, but as soon as
you enter the grade into the VoiceThread assignment, that grade will be passed
back to Blackboard for you automatically.

Image not Appearing in Test?

This is from the Bb listserv.  I thought it might be of interest.


…yesterday we had an instructor report that students could not see images in
test questions, but they could. After extensive testing, we discovered that
if the ‘Display Until’ date has passed, the images will no longer appear.In our situation…
Due to a recent issue of students cheating, the instructor set a 10 or 15
minute time window where students had to start the test.They did this by
using the ‘Display After’ and ‘Display Until’ settings. The test was
setup to present/display “One at a time”. When the ‘Display Until’ date
passed, the images no longer appeared in the test. The test continued to
function as normal and the text is all there, just the images do not
display and instead a broken image icon displayed. If the ‘Display Until’
date was changed to in the future, the images reappeared.

I submitted a support ticket to Bb Support and after submission it gives
you potentially related articles. One of those was a Nov 06,2015 “Article
No.- 000041338- Assessment Images and Other Attached Files Cannot be Viewed
While Inside a Test After Display Until Time”:
https://blackboard.secure.force.com/btbb_articleview?id=kA3700000004EdO

So our particular issue has been around for a while and doesn’t appear is
planned to be fixed anytime soon.

Jeffrey Ries
Applications Administrator/LMS
IT-Educational Technology & Media Services
University of Northern Iowa, Cedar Falls, Iowa

All Those Test Options in Blackboard & How to Give a Synchronous Test*

This blog entry is going to focus on the options in Blackboard that have to do with the timing of an test.

When you are first creating the Test.. these options are found under the Test Information area and span a few sections.  If you have already made the test you can find these options by clicking the chevron next to the test name and clicking “Edit the Test Options”.

Force Completion


When you set this option, if the student looses the connection or accidentally closes the browser, they will be unable to go back and finish the test. (Without you having to intervene anyway.)  We don’t recommend enabling this setting.

Set Timer

This option gives the student a visible countdown timer during the test. It begins after the test description and instructions have been displayed. If Auto-Submit  is selected, at the end of the count down, it ends the test, no matter where they were.  If Auto-Submit is not checked, you will see an exclamation point in the grade center and have the option to adjust the grade, if they went long.

If the Force Completion is not set, and a student looses their connection or accidentally closes the browser, they will be able to continue taking the test, and the timer will continue from when it initially started. (eg., If they loose the connection for 10 minutes, they loose that 10 minutes.)

Display After and Until

A better way of handling whether students can see the test, rather than the “Make the Link Available” option.  Also consider, they can’t start what they cannot see.  *So if you want everyone to be done by 1pm and you have a 30 minute timer with auto-submit enabled, consider Display Until to end around 12:30. 

Due Date

Due dates (and times) do not affect the test availability (unless you choose the Do not allow students to start the Test if the due date has passed option), but rather provide a flag on the test if it was started or ended after the due date/time.

Test Availability Exceptions

This section allows you to make test rule exceptions for people that need accommodations, or have other needs depending on language or technology situations.

If these settings exist for a test or survey, you can create these exceptions:

  • Number of attempts
  • Timer
  • Availability: Date and time the test is available to the student or group
  • Force completion
  • Restrict location


Have any interesting testing stories to tell?  What other testing options do you have questions about?  Please comment below!

This blog is a cross post from https://you.stonybrook.edu/academictechnologyservices

“Force Completion is one of those functions that sounds like it will be useful, but really is just a way of going swimming in cement boots.”

Accepting Videos as an Alternative form of Course Assessment

This is about using a echo360 mashup tool to accept video submissions inside of Blackboard and which instructor will be able to grade under Needs Grading in the Grade Center.  This is an excellent alternative to high stakes grading via traditional exams.

First you will want to create an assignment. You will go to your Assignments area and go to Assessments -> Assignment.

Give it a name and add instructions for the students to follow.

Create a due date and points possible for the presentation.

Make the assignment available to the students.

Submit.


What the students see:  (You can also see this yourself using the student preview mode, entered by clicking on this icon in the upper right part of the screen in blackboard:

Under assignments, they locate your assignment and click in it’s name.

They see the points possible and the instructions that you wrote previously.

They need to click on Write Submission to get to the Blackboard WYSIWYG editor. They should type the name of their assignment into this text box and then select the Mashups button.

Then they click on Mashups -> Echo360 Video Library

This opens a new window for them where they have three choices.    They can choose any video already in their echo360 video library. (That is Choose From My Home), they can create something new (Create New Media) or Upload a video they have on their computer. This is what the different options look like:

Choose from home allows the student to either browse or search for files in their echo360 library.

Create New Media will give them the option to Launch Universal Capture from their computer.

Where they can name the video and start recording from their webcam, desktop and audio.

and finally Upload Existing:

Here they can grab videos from their cloud storage locations or browse from their computer.

After they have typed the name of their presentation and selected the video, they will click submit.

After submitting they will get a submission confirmation:

As the instructor, you can find the student submission under Needs Grading in the Grade Center:

…where I will see the list of submitted assignments and I can either chose Grade All or go through them one by one.  Here is the assignment I submitted and you can view the presentation, grade it and leave feedback for the learner right here.

Huge Update in Echo360’s Universal Capture!

It now allows for live streaming!

I’ve done some tests already.  I’m seeing a 10 sec lag on what comes out of my mouth and what comes through the stream.  The screen share seems about 3 seconds ahead of my camera’s live video.  There is a 15 secondish lag between when you start streaming and the stream actually begins.

I was testing on a laptop that had a hard wire connection to my router at home… the receiving computer was on the wireless.


Here is their documentation which includes technical requirements:

https://learn.echo360.com/hc/en-us/articles/360041458112

I will be doing more tests… but this is awesome news for additional options for synchronous and asynchronous teaching and learning!

You don’t have to download a new version of the software.  If you have never used it before, the software can be downloaded from echo360.org with your netid and password.


More to follow!