Just change the ending to “if you have any questions, please feel free to contact CELT at 2-2777 or celt@stonybrook.edu”
If you want to be able to use these inline editing features, have your students submit MS Word .docx or .doc files.
Just change the ending to “if you have any questions, please feel free to contact CELT at 2-2777 or celt@stonybrook.edu”
If you want to be able to use these inline editing features, have your students submit MS Word .docx or .doc files.
Let’s set the stage:
You are in your Blackboard grade center in your course.
There are plenty of columns, in fact you are pretty sure there are more than you can see at the moment. But … there is the vertical scroll bar… and there, I’m pretty sure, is where the horizontal scroll bar should be, but it is not.
Did I mention that you are on a Mac? (I am too, no shame there.)
OK – this is a system setting on your Mac. Go to the Apple menu.
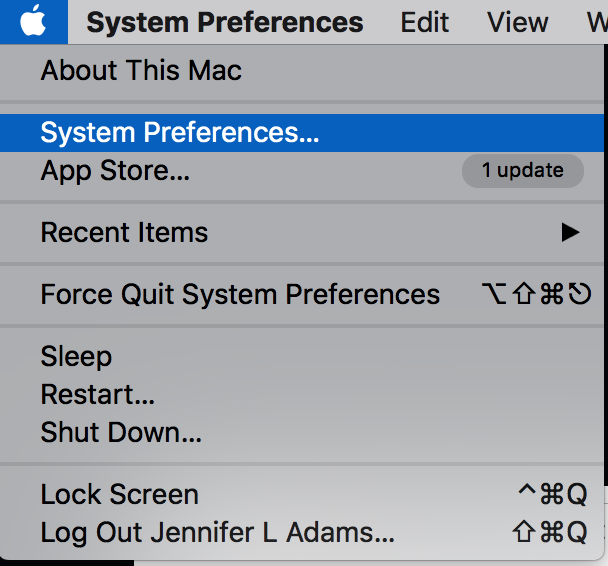
Select “System Preferences…”

Now select General.

and finally, make sure “Show scroll bars:” is set to Always.
OCR (Optical Character Recognition) is when a program looks at the image with text, recognises those shapes as in fact being text, and then leaves you with a document that is editable as text. (or at least matches this text up against the orginal file making it keyword searchable.)
It used to be that if you needed to do this you needed to have an expensive specialized program. These days, you can do this with your google drive and google docs.
For example,

here is a picture of a page in an old dictionary. You may have taken this picture with your phone.
The first thing we want to do is convert it to a pdf. You can do this in a number of ways, but I do it by choosing to print the file, not to paper, but to a pdf. This looks like this on a Mac (see thet pdf pulldown in the lower left?)

Now I have a pdf.
Note that this page does not have columns. This freebie method doesn’t handle columns well. You could still do it, but you would want to slice the image up so that in each picture was just one column, and then put them back together in the final document.
Next you take your pdf, and load it to your google drive:

Select File upload.
browse to your file and select it.
When it is done uploading, select “recent” so the new files are at the top and easy to find.

Now right click the pdf and choose Open with -> Google Docs.
When you open an image based pdf in google docs, it will automatically runs OCR, giving you a file that look like this:

and now you have an editable document.
“I need to add “So N. So” to my class as a TA (or some other role). How can I do this?”
Really, I would have thought it would be something more difficult; but it turns out that this is common enough and just barely tricky enough, that it merits lots of support calls.
Let’s walk through it.

3. Expand “Users and Groups”

4. Click on “Users”
5. Hover over Enroll User and click on “Find Users to Enroll”

6. Click on Browse

This opens this window:

7. I’m going to guess you might not know their username, but you probably know their email (which is also unique – remember, names are not unique). SO…. Use the pull down menu right after the word Search to set to email, leave contains, and click go after typing the first part of their email address into the search field. (exp. jennifer.adams)

8. Check the box next to their name and click “Submit”
9. Pick the role that you want them to have in the course… in this case I’ve picked Teaching Assistant, and click Submit.

And that is it! I’m going to remove Dr. Stanley from this course now.
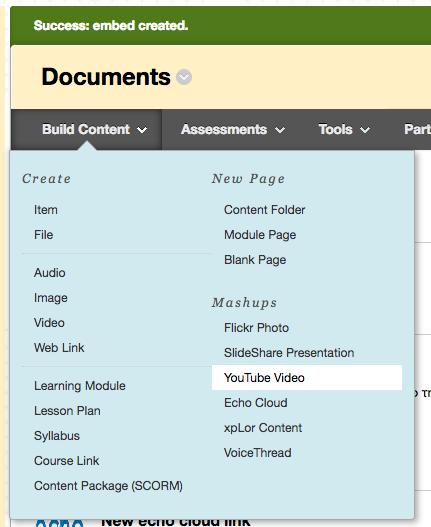
Blackboard has this cute mashup feature where you can go into your course, go to the content folder of your choice, select Build Content and select YouTube Video. You don’t even have to know the URL of what you are looking for… it lets you search by keywords and select the video right there.
but – the window is smallish and the ability to make it bigger seems non-existent.

So – if you need the video to be bigger…. here is what you can do:
Go to YouTube.com and search for the video you want there. When you find the video, click on Share…

then embed…

now Show More…

and finally, pick the video size you would like to display in Blackboard:

Copy the code provided… it is the one that starts with “<iFrame width” as seen above.
Now head back to Blackboard….
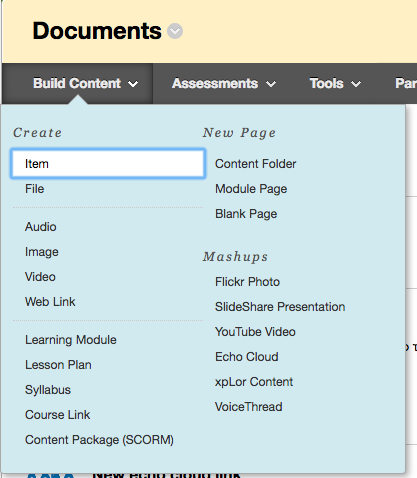
Go to your Documents folder (or whatever content folder you desire), Build Content -> Item:
Give it a Name, then click the chevrons in the upper right hand corner of the Text box.

Which reveals more wysiwyg tools:

click the HTML tool and paste in the code from your clipboard:

click update and click submit.
Now you will get this gorgeous and large video, right in your folder – just like this. (This is the same embed code as seen in WordPress.)
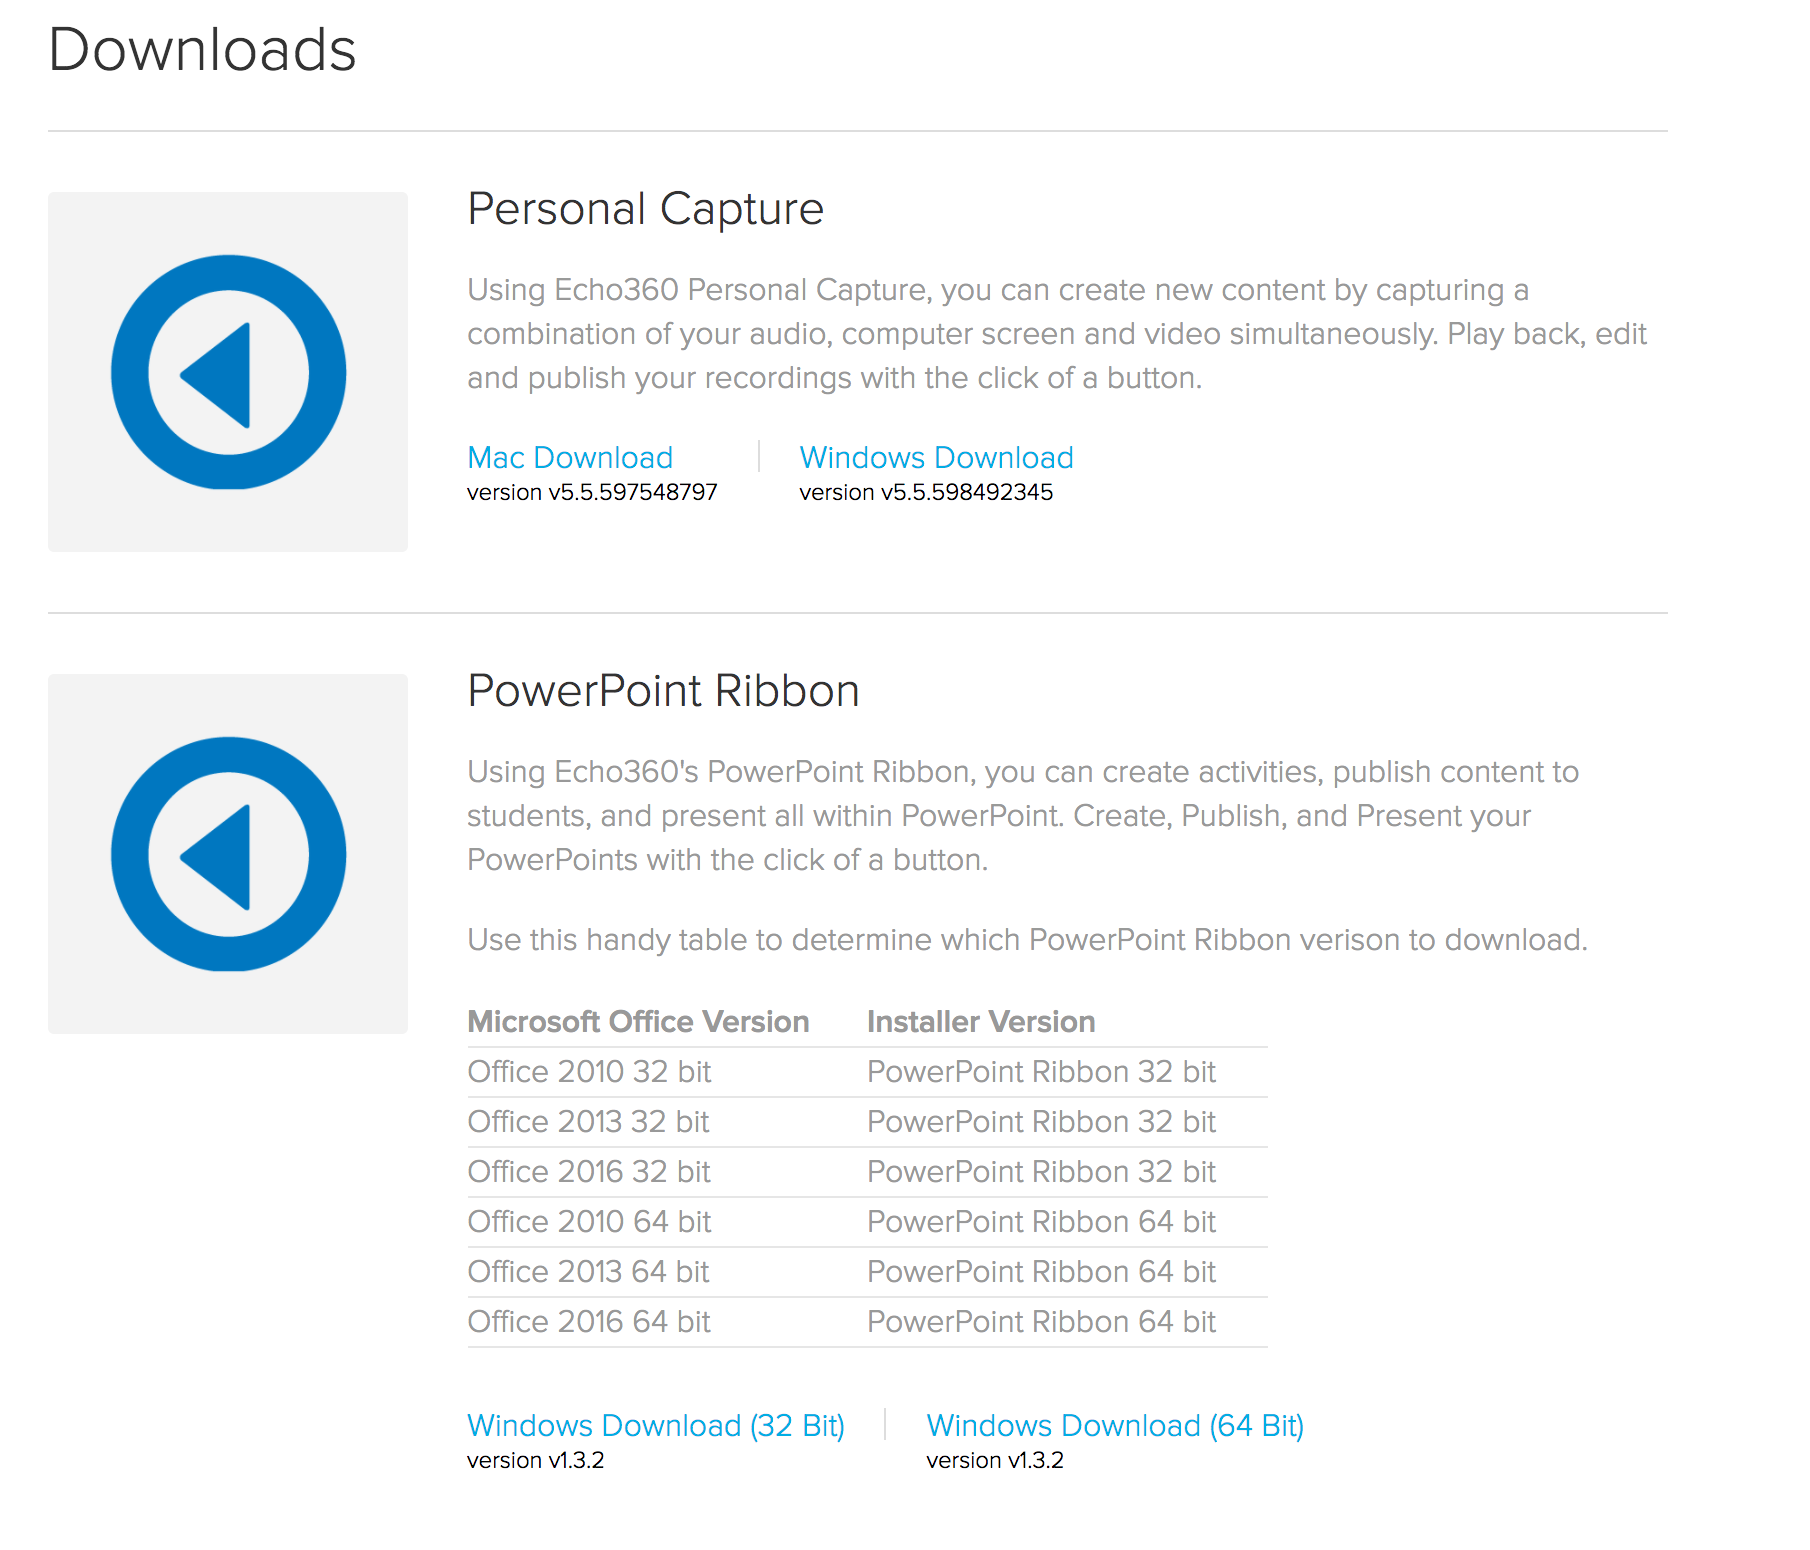
As we have moved to echo360 in the cloud… the new place to find your personal capture software is now also in the cloud.
From the main page that you first see when you login – go here:

or go directly to this link:
Don’t forget to still let us know that you are using the software by filling out this form.
You may have a bunch of files that you want to share with your class. Are they a bit on the larger side? Perhaps it will make some servers happier if you store them in Google Drive rather than directly into your Blackboard course site. (Think a semester’s worth of videos.)
So, then – how do you share them with your students in such a way that they can’t be downloaded? (I’m not saying that allowing students to download the videos is a bad thing. Downloading can make it easier for offline consumption of the material – like while on an airplane or other low access areas like southern Maryland.)
The first part of this process makes perfect sense. We want to be organized, so we create a folder for the content. You created the folder and that makes you the owner.
Next, you share the folder. If you double click on the folder, it will open, leaving you with a screen that shows it’s path at the top.

Clicking on the name of the folder (you did name it, right?) Will reveal a drop down menu:

Select “Share…”

See that tiny font in the lower right corner… it says “Advanced” — click that.
Then there are owner settings at the bottom. Please check off “Prevent editors from changing access and adding new people.” This will help prevent some headaches later if you give someone access higher than what you really wanted.


Now – add your students. I’ll show you want I do, but you might have a easier way. Feel free to comment below.
Go to your Blackboard course site, and go to “Users and Groups”

Open Users.
Show All in the lower right, and sort by columns by “Row” (this will lump the Instructors, Teaching Assistants and SLN Help Desk people at the top and bottom of a list of all your students.


Drag your cursor to highlight all of the student emails on the page and copy them to your clipboard (command C). This unfortunately grabs other columns as well that include usernames and other information that we don’t need, but that isn’t so bad.
Next, paste this into an empty spreadsheet. I use Numbers. Make sure all the emails are in the same column, my very first row usually has the email in the wrong column, so I paste it into the right one. Then I delete all the non email columns, select all and copy the one column that is left that has the emails. (Yes you can probably select all of that one column without deleting the others… but like I said, this is just what I do.)
Now with the emails on your clipboard go back to your Sharing Settings of the folder, and paste them into the “Invite people:” text box.

Even if there are hundreds of addresses, this should be fine, though you may need to let google think on it for a bit.
Make sure you aren’t giving them the keys to the kingdom… and select “Can view only”

Next, add the files.
You may think you are done. After all, you said they can “view only.” Viewing is viewing and downloading is something else right, so it shouldn’t be able to be done if you can only view. Not true in Google Drive.
For each file that you have loaded into the folder, we need to back into that sharing settings. We get to it in a slightly different way. Highlight the file by clicking it once. After it is highlighted, some more tool icons show up in the upper right. Pick the one that looks like a person with a plus sign.

Click Advanced again.
There is a new option! Make sure “Disable options to download, print, and copy for commenters and viewers” is checked.

Now, do that for every file in your folder. You are done!
** (Note that your students can still screen capture your videos and share them with whomever they want if they are really determined. That is just what people do. If you lock a door, it just makes people more determined to get inside.)
UPDATE: the chrome://plugins area has been deprecated. Use this link now: https://helpx.adobe.com/flash-player/kb/enabling-flash-player-chrome.html
I was having more and more trouble as time went on with some features in echo360’s editing area. It sends an error complaining about flash not being new enough… but I knew I had the newest one installed… very frustrating. I know that Apple and Adobe don’t always get along – especially when it comes to Flash, so I just went with it for a bit. But hey – turns out that there is an actual solution, and it isn’t in the apple preferences, it’s in the browser preferences.
The other fun bit, is you can’t just pull down a normal settings menu and expect to find this… you have to type into the URL field: chrome://plugins to get to these preferences.

https://helpx.adobe.com/flash-player/kb/enabling-flash-player-chrome.html
All fixed!

Bryan Alexander
Featuring keynote speaker Bryan Alexander
Dr. Alexander is an educational technology futurist, researcher, writer, speaker, consultant, and teacher,
working in the field of how technology transforms education.
He completed his English language and literature PhD at the University of Michigan in 1997.
CLICK HERE TO REGISTER
Registration cost is $15 for Stony Brook attendees and $30 for non-SBU attendees
Agenda Friday, April 17, 2015
All events will be in the Student Activities Center
Time Session Room
8:30-9:30 Registration / Vendor Expo SAC Y Lobby /Ballroom A
9:30-10:30 Keynote: Bryan Alexander SAC Auditorium
10:30-11:00 Vendor Expo SAC Ballroom A
11:00-11:30 Breakout Session I SAC Rooms 302, 303, 304, 305
11:45-12:15 Breakout Session II SAC Rooms 302, 303, 304, 305
12:15-1:30 Lunch / Vendor Expo SAC Ballroom A
1:45-2:15 Breakout Session III SAC Rooms 302, 303, 304, 305
2:30-3:00 Breakout Session IV SAC Rooms 302, 303, 304, 305
3:00 Vendor Expo Ends SAC Ballroom A
Start Date
Friday, April 17, 2015 – 8:30am
End Date
Friday, April 17, 2015 – 3:00pm


